THIS PAGE HAS BEEN MOVED TO SHAREPOINT!
Please refer to this site/make edits here for the most updated information: https://partnershealthcare.sharepoint.com/sites/LCN-Exvivo/SitePages/3D-Scanning.aspx
Exvivo Scanning with the EinScan Software
This page documents the hemi 3D-scanning process using the Shining 3D desktop scanner and the EinScan scanning application. You can install the EinScan software on your macbook from the Shining 3D website.
Scanning
- Turn on the scanner and plug it into the laptop via USB.
Open the EinScan app (scanner must be plugged into the laptop before opening) and select the EinScan-SP model.
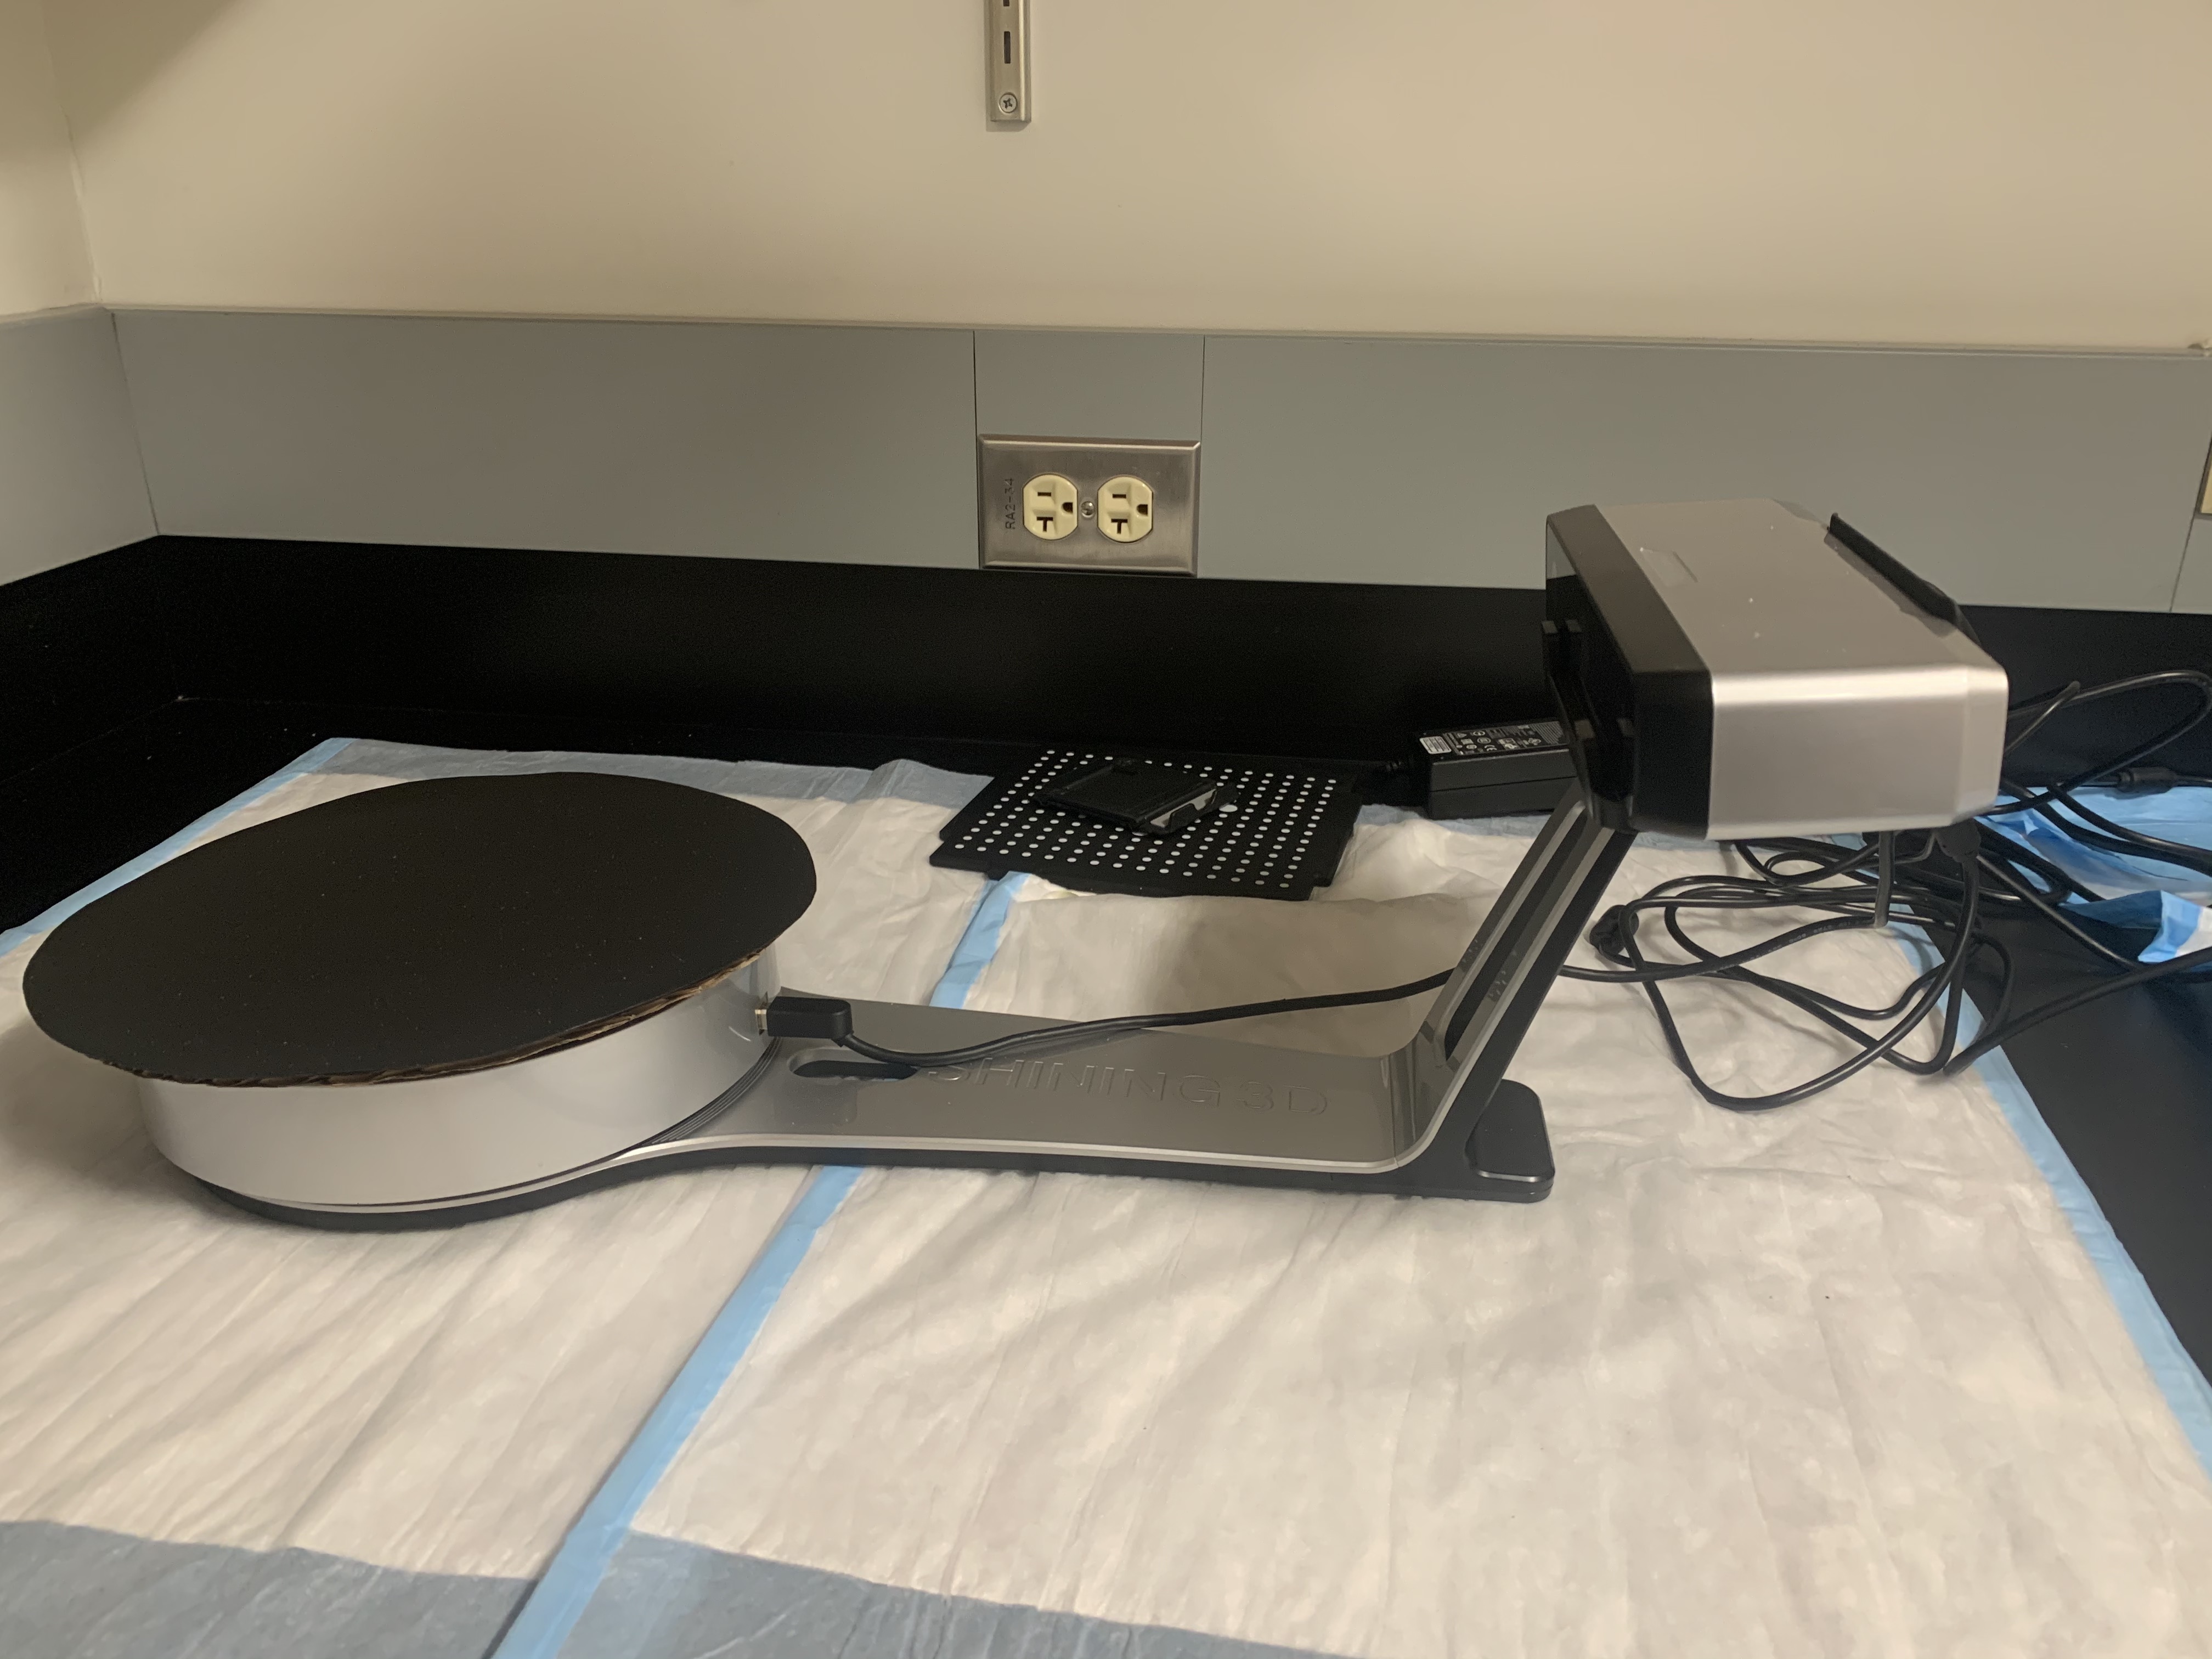
Select Calibrate and follow the on-screen instructions using the calibration board. There is no need to use the black plastic mat at this point, you can place the calibration board right on the turntable. Make sure that for the first set of scans, the camera is setup in the standard position as shown below.

After calibration, select Fixed Scan and New Project. Be sure to manually create a new folder for the project, since the "save as" field is actually just a prefix for the many files that get created. Ideally we should use the brain ID and hemi as the prefix. For example: I55-lh.
Configure a Non-Texture Scan with medium brightness.
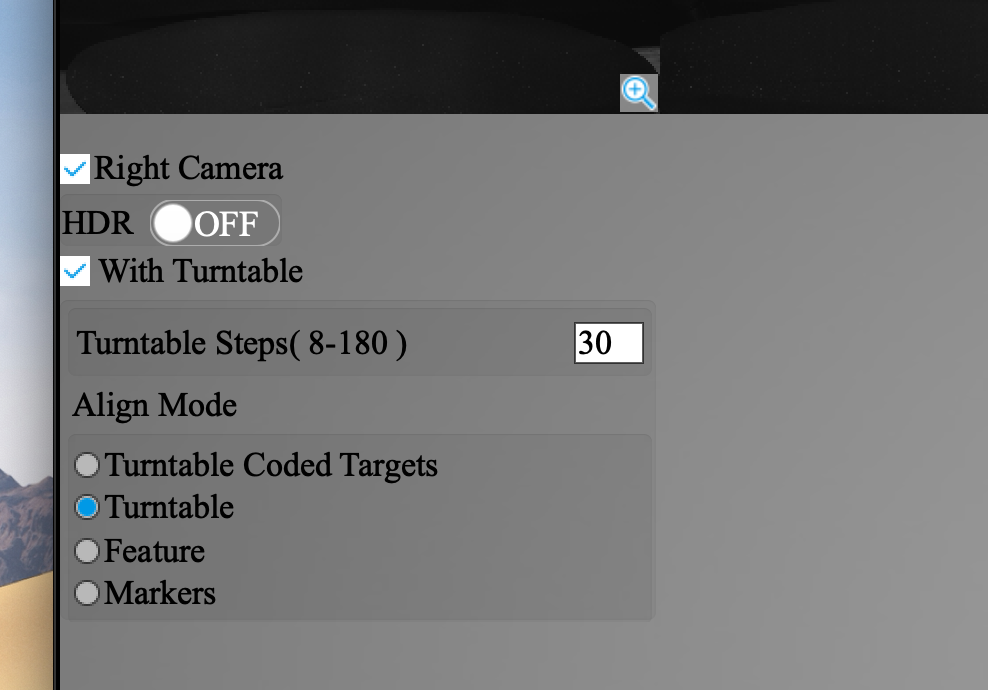
Make sure the Right Camera and With Turntable checkboxes are selected along with the Turntable sub-option as shown below.

NOTE: 30 steps per scan indicates the number of steps in a 360 degree rotation on the turntable. 30 is a somewhat arbitrary choice - it could probably be lower without sacrificing resolution, but it doesn't take that long so it's not a big deal.Center the hemi medial-side-down on the black plastic mat, place the mat on the turntable, and press the Start Scan button at the top right of the interface. The scan should take a few minutes, and the aqcuired point sets should be updated on the display in real time.
After the scan is complete, press the check mark if it looks good. If there are artifacts, you can use shift + left click + drag to select unwanted regions to remove via the Delete Selection tool at the bottom on the screen.
- Flip the hemi to the medial-side-up position and repeat the scanning process. After this data has been acquired, the new point sets should correctly align with the first point sets.
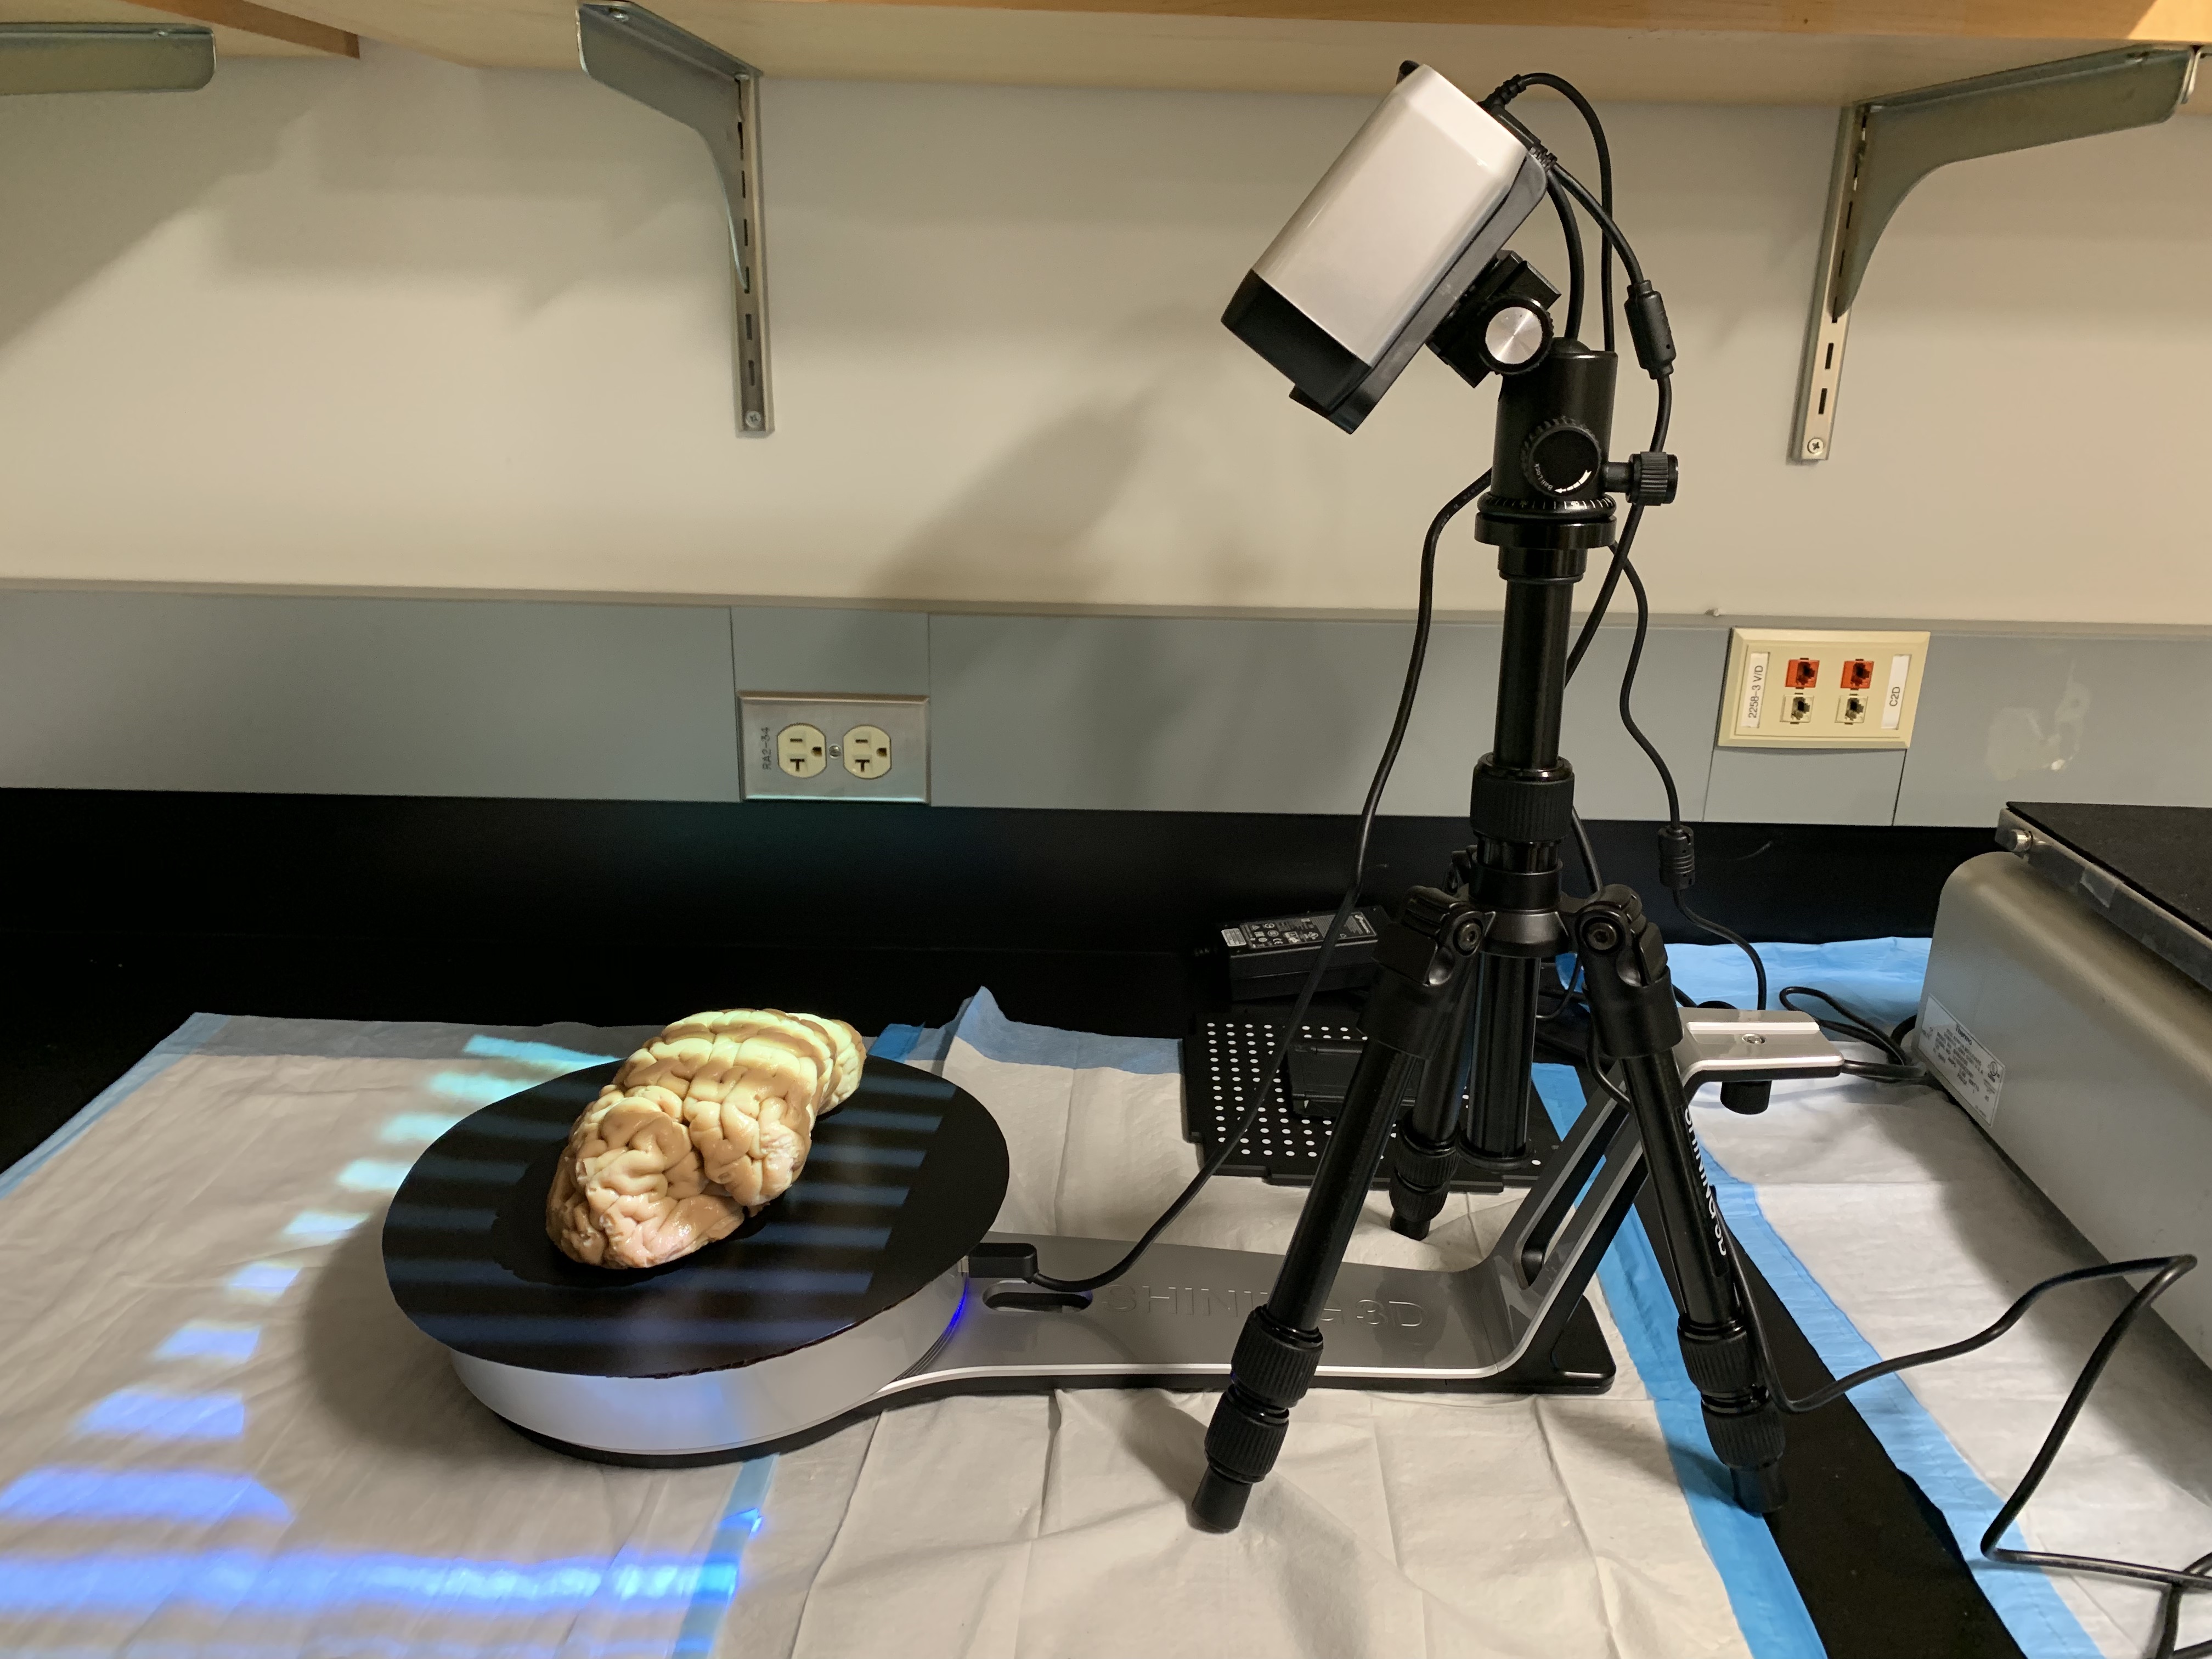
In the current position, the camera can't get a good look at the medial wall and the lateral gyri, so we have to repeat the last two scans with the camera perched at a better angle. Remove the mat (and brain) from the turntable. Unscrew the base of the camera from the turntable arm and attach the camera mount to the tripod. Try to position the tripod the way it's shown here (this seems to work well).

Recalibrate the software by clicking the home button and selecting Calibrate again (don't worry about losing data, the project autosaves as it scans). Make sure the calibration board is almost fully illuminated by the camera light - otherwise the calibration will probably fail.
Select Fixed Scan again but this time select Open Project. It should automatically bring you to the last project directory, where you can select the corresponding project file with a .fix_prj extension. Once again, make sure that the Right Camera and With Turntable checkboxes are selected.
- Repeat the scanning procedure as before, starting with medial-side-down then medial-side-up. This will leave you with a final collection of 120 individual point sets (30 steps x 4 scans), that should hopefully be correctly aligned with each other.
- At this point you can close the app, unplug cables, and deal with post-processing after cleanup (since saving and meshing takes a while).
Processing
Open the project in the EinScan app, and select the Save Your Scan button. This will save a series of point sets (in .asc format) to the specified directory (you should use the previous prefix when saving these files). The point sets aren't super important, but they contain the raw information collected by the scanner, so it's good to retain this data as it might be useful down the road.
Generate a surface by selecting the Mesh button and configuring a watertight model with low resolution.
After meshing is complete, deselect the smooth and sharpen options before pressing Apply. Select the save button again to save the surface as an stl mesh in the project directory.
- The saved asc and stl files can be copied to the Martinos network by running the following from the project directory.
scp *.stl *.asc user@door.nmr.mgh.harvard.edu:/path/to/target/directory
- The final surface stl won't be in the correct anatomical orientation, and it needs to be manually aligned to a template (bert) using the register script in this directory. The usage is as follows:
./register <insurf> <?h> <outsurf>
Ideally you'd want to save the output surface in freesurfer format, for example:./register I55.stl lh lh.I55
