top | previous (Directory Structure)| next (First Level Analysis)
Contents
1. Introduction to FS-FAST Preprocessing
Once the data have been arranged in the proper directory structure and naming convention, they are ready to be preprocessed. Preprocessing includes
- Template Creation
- Brain Mask Creation
Registration with FreeSurfer Anatomical
- Motion Correction
- Slice Timing Correction (if using)
- Spatial Normalization
- Masking
- Spatial Smoothing
In FS-FAST, it is assumed that each data set will be analyzed in three normalization spaces:
- Left Cortical Hemisphere
- Right Cortical Hemisphere
- Subcortical Structures (Volume-based)
You will need to decide how much to smooth the data and whether you want to do slice-timing correction. In this analysis, we will smooth the data by 5mm Full-Width/Half-Max (FWHM) and correct for slice timing. The slice-timing for this particular data set was 'Ascending', meaning that the first slice was acquired first, the second slice was acquired second, etc. To preprocess the data, you could run a command similar to the one below.
Do not run this command if you're at an organized course.
It can take a while and the data has already been pre-processed for you.
preproc-sess -s sess01 -fsd bold -stc up -surface fsaverage lhrh -mni305 -fwhm 5 -per-run
If you accidentally run this command, you can hit Ctrl+C to cancel it. You should already have the output data available to you and can proceed to the next step. This command has several arguments:
- -s sess01 : indicates which session to preprocess. You can use multiple -s flags to specify multiple subjects, or use -sf to specify a sesslist.
- -fsd bold : indicates the functional subdirectory (FSD)
- -stc up : slice-timing correction with ascending ('up') slice order
- -surface fsaverage lhrh : indicates that data should be sampled to the left and right hemispheres of the 'fsaverage' subject
- -mni305 : indicates that data are resampled to the mni305 space (2mm isotropic voxel size)
- -fwhm 5 : smooth by 5mm FWHM after resampling (volume and surface separately)
- -per-run : run-wise motion correction and registration. You should always use -per-run, unless you want to do an analysis within the native functional space (and not resample into fsaverage or mni305). In that case you should use the -per-session flag.
Run preproc-sess --help for more flag options.
This command does a lot, and it can take quite a long time to run, especially for many subjects. Look at the contents of one of the run directories:
export SUBJECTS_DIR=$TUTORIAL_DATA/fsfast-tutorial.subjects
cd $TUTORIAL_DATA/fsfast-functional
ls $TUTORIAL_DATA/fsfast-functional/sess01/bold/001
You will see many files there, but there are three important ones:
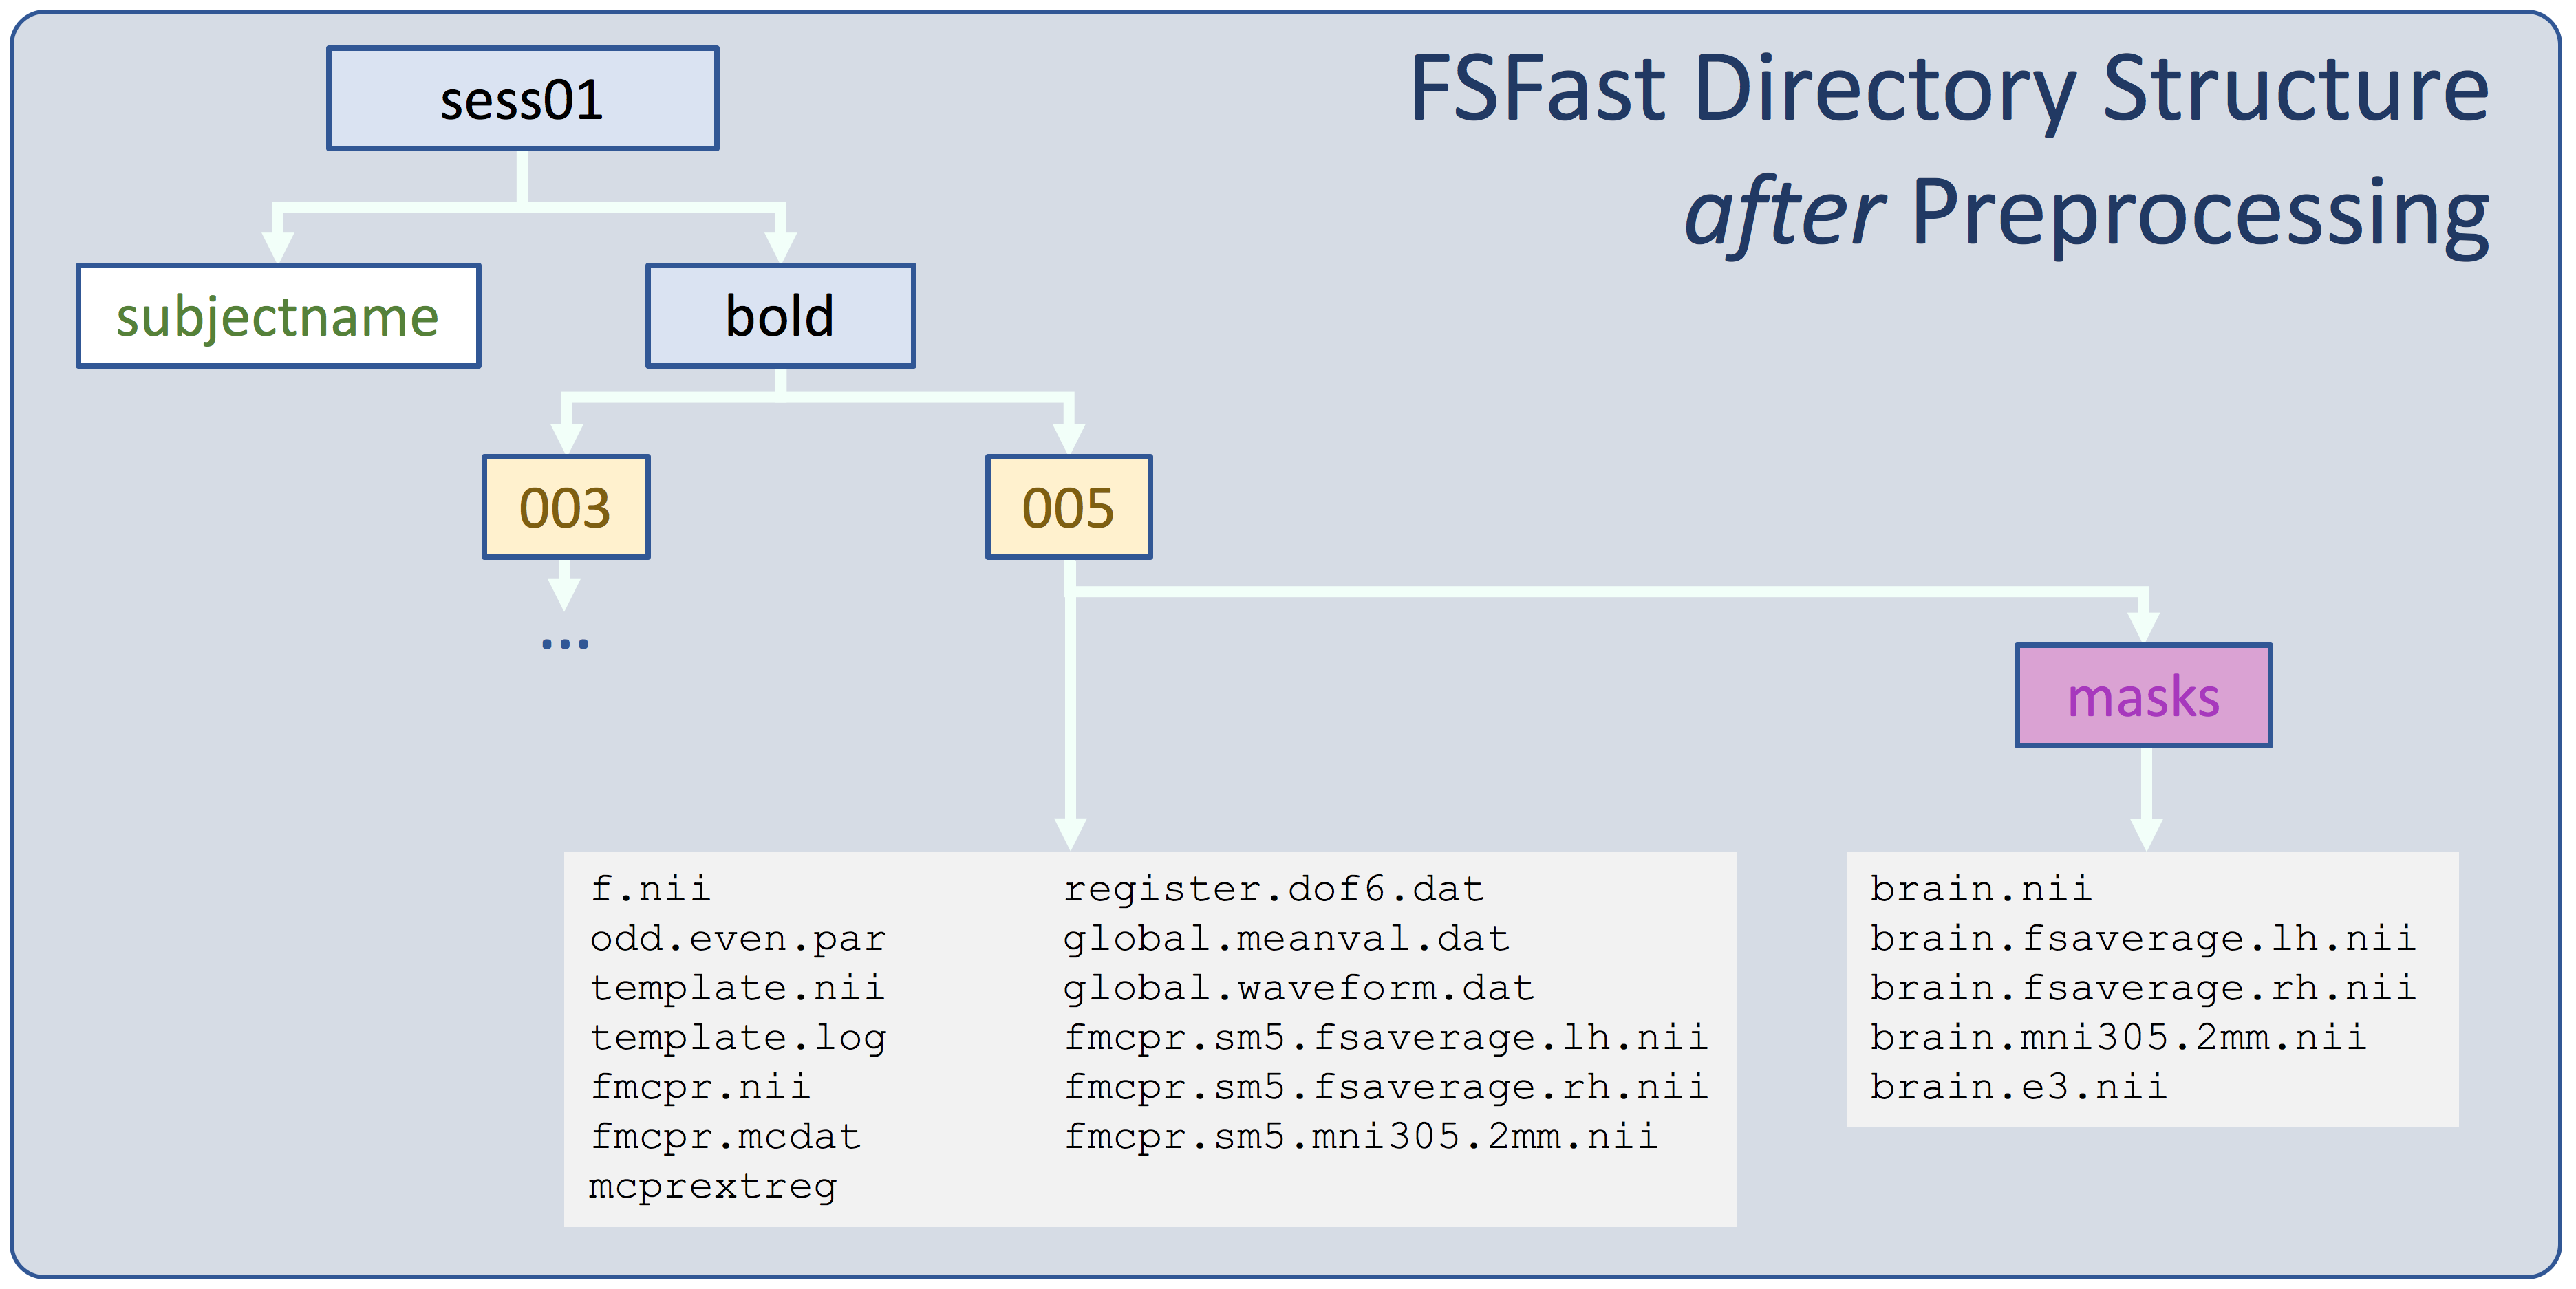
- fmcpr.up.sm5.fsaverage.lh.nii.gz - Left hemisphere of fsaverage
- fmcpr.up.sm5.fsaverage.rh.nii.gz - Right hemisphere of fsaverage
- fmcpr.sm5.mni305.2mm.nii.gz - Volume of fsaverage (MNI305 space) - for subcortical analyses
These are time series data, and their names indicate what has been performed on them:
- fmcpr - motion correction, per-run
- up - slice-timing correction using ascending
- sm5 - smoothed by 5mm FWHM (after resampling)
- fsaverage.lh - sampled on the surface of fsaverage left hemi
- fsaverage.rh - sampled on the surface of fsaverage right hemi
- mni305.2mm - sampled in the fsaverage (MNI305) volume at 2mm isotropic
The image below is an overview of the FS-FAST directory structure. This is an example of the kinds of files you should expect to see- naming conventions and number of files may be different.

To learn more, see Preprocessing Details below.
2. Quality Assurance
2.1. Functional-Anatomical Cross-modal Registration
You can get a summary of registration quality using the following command:
tkregister-sess -s sess01 -s sess02 -s sess03 -fsd bold -per-run -bbr-sum
This prints out a value for each run for each session:
sess01     001 0.5740
sess01     002 0.5776
sess01     003 0.5813
sess01     004 0.5740
sess02     001 0.5159
sess03     001 0.6021
- The first column is the Session ID
- The second columnn is the Run inside the Session
- The third value is the quality assurance (QA) value. It will be between 0 and 1, with 0 being perfect and 1 being terrible.
Actual values depend upon exactly how you have acquired your data. Generally, anything over 0.8 indicates that something is probably wrong, such as:
- Functional and structural are not the same subject (subjectname file is wrong)
- The functional is left-right reversed
- The initialization failed (happens sometimes with partial Field-of-View)
You can view registrations using the following command:
tkregister-sess -s sess02 -fsd bold -per-run

- This will display the registration for each of the runs in Freeview.
- For now, simply glance at the registration and verify that it looks good.
- Quit out of Freeview.
If you want to learn more about using tkregister or Freeview for registration, see the Multimodal Tutorial.
3. Preprocessing Details (You can skip this section or defer to the end of the FreeSurfer Course)
You do NOT need to perform the steps below to understand the rest of the tutorial. This is provided to allow you to understand the inner workings of FS-FAST preprocessing better. Go back into one of the run directories and see what preproc-sess creates. To do this,
cd $TUTORIAL_DATA/fsfast-functional/sess01/bold/001
ls
This directory previously held only f.nii.gz, workmem.par, and wmfir.par before preprocessing. Now there are a lot of files, each indicative of a different preprocessing stage. Now type
ls -ltr
This command sorts the files by creation time with the oldest at the top and the newest at the bottom. The preprocessing is progressive, meaning that the output of one stage is the input to the next.
3.1. Template
This stage creates template.nii.gz (and template.log). This is the middle time point from the raw functional data (f.nii.gz). This is the reference used to motion correct and register the functionals for this run to the anatomical. It is also used to create masks of the brain.
Verify that it has the same dimension and resolution as the raw data using mri_info:
mri_info template.nii.gz
mri_info f.nii.gz
3.2. Masking
The masks for this run are stored in the 'masks' directory. Run ls -ltr masks. You will see a file called 'brain.nii.gz'. This is a binary mask created using the FSL BET program. There is also a file called 'brain.e3.nii.gz' which is the mask eroded by three voxels. The eroded mask is used to assure that the mean is only computed from brain tissue (this reduces edge effects). These have the same dimensions as the template. View the masks with:
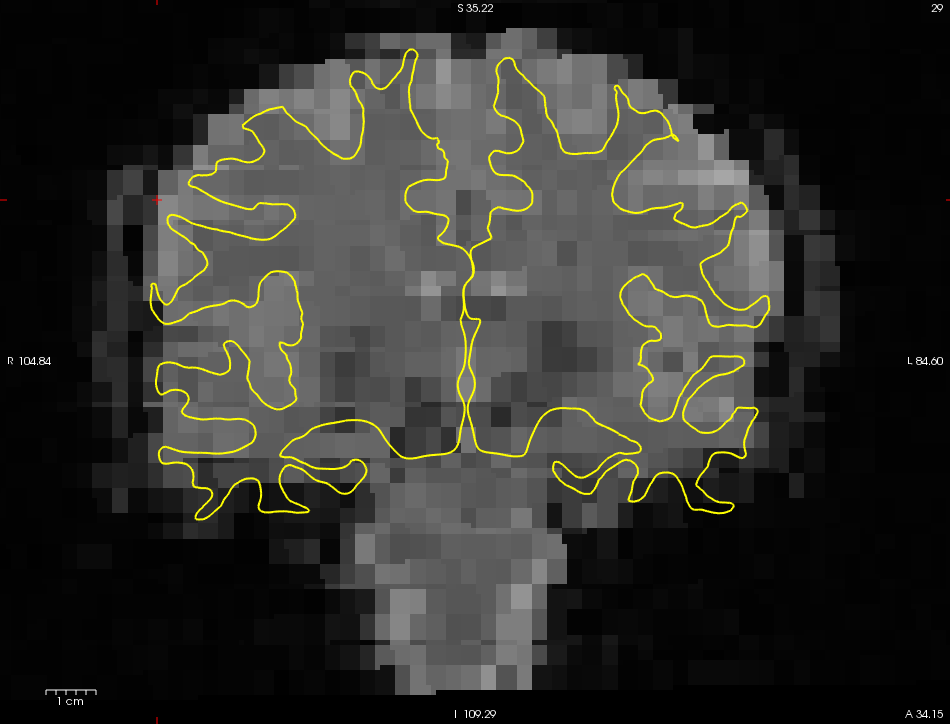
freeview -v template.nii.gz masks/brain.nii.gz:colormap=heat:opacity=0.75 -viewport coronal
freeview -v template.nii.gz masks/brain.e3.nii.gz:colormap=heat:opacity=0.75 -viewport coronal
You can play with the opacity of the mask by moving the opacity slider or entering a new value. Right now, the mask opacity is set to 0.75 (by including 'opacity=0.75' in the freeview command) so that you can see where there is overlap with the template volume. The brain.nii.gz is used to constrain voxel-wise operations. The eroded mask (brain.e3.nii.gz) is used to compute the mean functional value used for intensity normalization and global mean time course. There are other masks there that we will get to later.
3.3. Intensity Normalization and Global Mean Time Course
By default, FS-FAST will scale the intensities of all voxels and time points to help assure that they are of the same value across runs, sessions, and subjects. It does this by dividing by the mean across all voxels and time points inside the brain.e3.nii.gz mask, then multiplying by 100. This value is stored in global.meanval.dat. This is a simple text file which you can view. At this point, this value is stored and used later. A waveform is also constructed of the mean at each time point (text file global.waveform.dat). This can be used as a nuisance regressor.
- What are the global means for runs 1, 2, 3, and 4?
3.4. Functional-Anatomical Cross-modal Registration
The next six files (init.register.dof6.dat, register.dof6.lta, register.dof6.dat.sum, register.dof6.dat.param, register.dof6.dat.mincost, register.dof6.dat.log) deal with the registration from the functional to the same-subject FreeSurfer anatomical. There are only two files here that are really important: register.dof6.lta and register.dof6.dat.mincost.
- register.dof6.lta - is a text file that contains the registration matrix.
- register.dof6.mincost - is a text file that contains a measure of the quality of the registration.
3.5. Motion Correction (MC)
The motion correction stage produces these files: fmcpr.mat.aff12.1D, fmcpr.nii.gz, mcprextreg, mcdat2extreg.log, fmcpr.nii.gz.mclog, and fmcpr.mcdat. There are only three important file here:
- fmcpr.nii.gz -- this is the motion corrected functional data. It has the same size and dimension as the raw functional data.
- fmcpr.mcdat - text file of the amount of motion at each time point. This is important for Quality Assurance (see below).
- mcprextreg - text file of the motion correction parameters assembled into an orthogonalized matrix that can be used as nuisance regressors
Verify that fmcpr.nii.gz has the same dimensions as f.nii.gz using mri_info (see example under section 4.1).
3.6. Slice-Timing Correction (STC)
Slice-timing correction compensates for the fact that each of the 30 slices was acquired separately over the course of 2 sec. It does this by interpolating between time points to align each slice to the time of the middle of the TR. The file created with this is fmcpr.up.nii.gz (and fmcpr.up.nii.gz.log).
Verify that fmcpr.up.nii.gz has the same dimensions as f.nii.gz using mri_info (see example under section 4.1).
3.7. Resampling to Common Spaces and Spatial Smoothing
At this point, the functional data has stayed in the 'native functional space', ie, 64x64x30, 3.4x3.4x5mm3. Now it will be sampled into the 'common space'. The common space is a geometry where all subjects are in voxel-for-voxel registration. There are three such spaces in FS-FAST:
- Left hemisphere of fsaverage (fmcpr.up.sm5.fsaverage.lh.nii.gz)
- Right hemisphere of fsaverage (fmcpr.up.sm5.fsaverage.rh.nii.gz)
- Volume of fsaverage (MNI305 space) - for subcortical analyses (fmcpr.sm5.mni305.2mm.nii.gz)
Each of these is the entire 4D functional data set resampled into the common space. The spatial smoothing is performed after resampling. Surface-based (2D) smoothing is used for the surfaces; 3D for the volumes. Check the dimensions of the MNI305 space volume:
mri_info --dim fmcpr.up.sm5.mni305.2mm.nii.gz
mri_info --res fmcpr.up.sm5.mni305.2mm.nii.gz
The dimension will be '76 76 93 142' meaning that there are 76 columns, 76 rows, 93 slices but still 142 time points (same as the raw data). The resolution will be '2.0 2.0 2.0 2000' meaning that each voxel is 2mm in size and the TR is still 2 sec. The transformation to this space is based on the 12DOF talairach.xfm created during the FreeSurfer reconstruction. Check the dimensions of the Left Hemisphere 'volume':
mri_info --dim fmcpr.up.sm5.fsaverage.lh.nii.gz
mri_info --res fmcpr.up.sm5.fsaverage.lh.nii.gz
The dimension is '163842 1 1 142'. This 'volume' has 163842 'columns', 1 'row', and 1 'slice' (still 142 time points). You are probably confused right now. That's ok, it's natural. At this point the notion of a 'volume' has been lost. Each 'voxel' is actually a vertex (of which there are 163842 in the left hemisphere of fsaverage). Storing it in a NIFTI 'volume' is just a convenience. The 'resolution' is '1.0 1.0 1.0 2000'. The values for the first 3 dimensions are meaningless because there are no columns, rows, or slices on the surface so the distances between them are meaningless. The last value indicates the time between frames and is still accurate (2 sec). The transformation to this space is based on the surface-based intersubject registration created during the FreeSurfer reconstruction.
4. Summary
By the end of this exercise, you should know how to:
- create a preproc-sess command
- find your preprocessed data
- check the registration between your functional data and structural recon.
5. Quiz
This is the end of the first section of the FS-FAST tutorials. You can test your knowledge of the first part of this tutorial by clicking here for a quiz!
top | previous (Directory Structure)| next (First Level Analysis)
